
Gen II Volvo HID Light Conversion
8/1/2015
Update:
This project has evolved into an orderable kit that easy to install. Information on the kit is found at HHRV Lighting
Nuke-E wanted to improving the headlights of his Gen II Volvo. He first performed headlight lens polishing choosing the 3M System. Still not satisfied, Nuke-E decided to do a HID conversion similar to other vehicles he had done. The following is excerpted form his original Forum post.
I took on a bigger challenge: I wanted bi-xenon HIDs, mounted in the low-beam projector location. I also knew the Volvo Lighting Control Module would be out to get me if I installed a normal relay harness, and that we had a CAN-BUS data network. Knowing that I might have issues, I wanted the whole thing to be reversible if it didn't turn out well. I exchanged a few e-mails with Nate at TRS, who made a few suggestions. Here's what I ended up with, basically $300 total from The Retrofit Source.
- Morimoto Mini D2S Bi-Xenon Projectors
- Morimoto 35W Ballasts
- Morimoto 35W 4300K Bulbs
- Morimoto H11 Standalone CAN-BUS Adapters
- High beam splitters (9005 Male to 9005/9006 Female)
- 8 M4-0.70 screws (I bought 45mm long, but 30 or so would have been enough)
- some fiberglass sheet (this was intended to be temporary, but is working well)
Compared to a lot of other retrofits, this one really is easy, once a few things are figured out, everything fits in through the twist-off low beam access cover, and everything electrical just plugs in. I chose the Mini D2S projectors after attempting to fit the FX-Rs through the hole, while many retrofits require separating the front and back halves of the housing, I wasn't willing to do that here (and didn't think I needed to). They are 2.5" lenses, just like the factory projectors, so from the outside no one would be able to tell anything had been done.
Here's what I did:
- Remove the headlight assemblies. 10mm socket, 5 bolts, and one electrical connector. You have to remove the locking clip from the connector before releasing the latch.
- Unscrew the bulb access covers, unplug both bulbs, and remove the 4 Phillips screws that hold the low beam (upper) projector in place. Remove the low beam projector, it will come out of the hole, but it has to be oriented just right.
-

Grind down the upper corners of the new projectors (I used a titanium bit on a Dremel tool). This is necessary to allow the new lights to reach forward enough to sit flat against the hole the original projectors go through. Make sure you have some room to rotate the light, so you can be sure it's aligned correctly. -
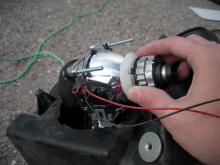
Replace the screws holding the two halves of the new projectors with longer screws. -

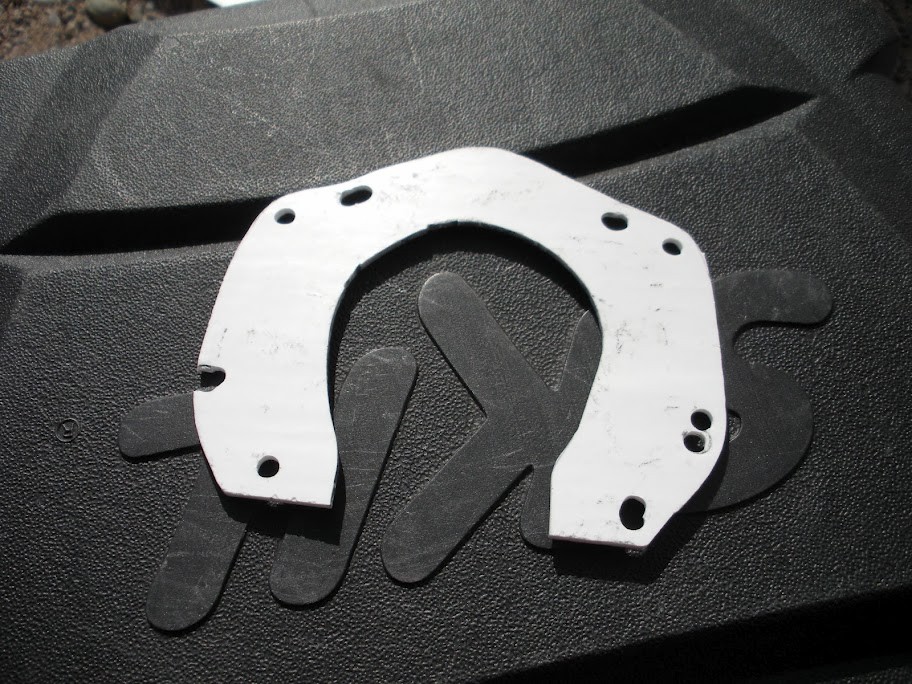
Make up a plate to adapt the old mounting holes to the new projectors. I intended to install nuts on both sides of my adapter plates, but was able to cut out the center hole in the plate such that it was able to hold the light in place. The screws go through the bracket, and serve to keep the headlights from rotating. -

Install the projectors (bulbs already in them) and plates, then connect the ballast to the bulb. -
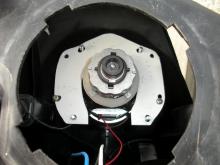
The supply side of the ballast plugs in to the CAN-BUS adapter, which includes the adapter to match the H11 plug on the factory harness. Make sure blue wires on both sides of this connection mate up. I spent a long time trying to figure out why one side wasn't working, the ballasts are polarity sensitive - Insert the two loose wires from the projector (for the high beam solenoid) into the included plug, then install the high beam splitter to supply this connector and the factory high beam from the factory connector.
- Mount ballasts, CAN-BUS adapters, etc. inside the headlight housing, and reinstall everything, then check the alignment.


I still need to set up the LCM to leave the low beams on with the high beams (and fix one of the adjusters), but everything works, with no warnings from the LCM.
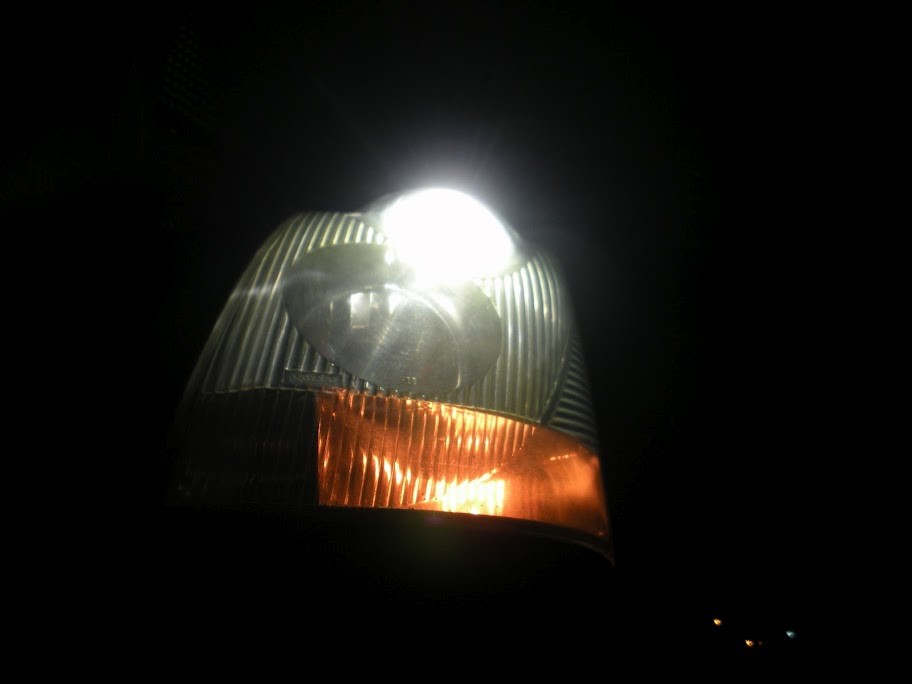
Some finished pictures:


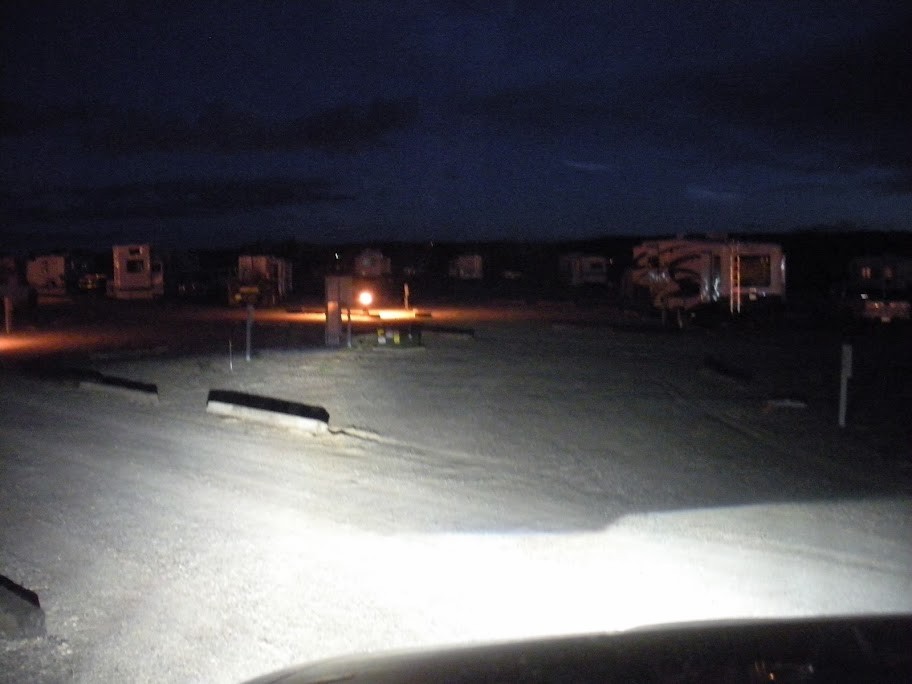
Notice in the next two pictures the sharp difference in how the lens looks depending on how high you are. If you're below the bulb, it's very bright, but above you don't see much light, getting good light onto the pavement without causing glare for other drivers:

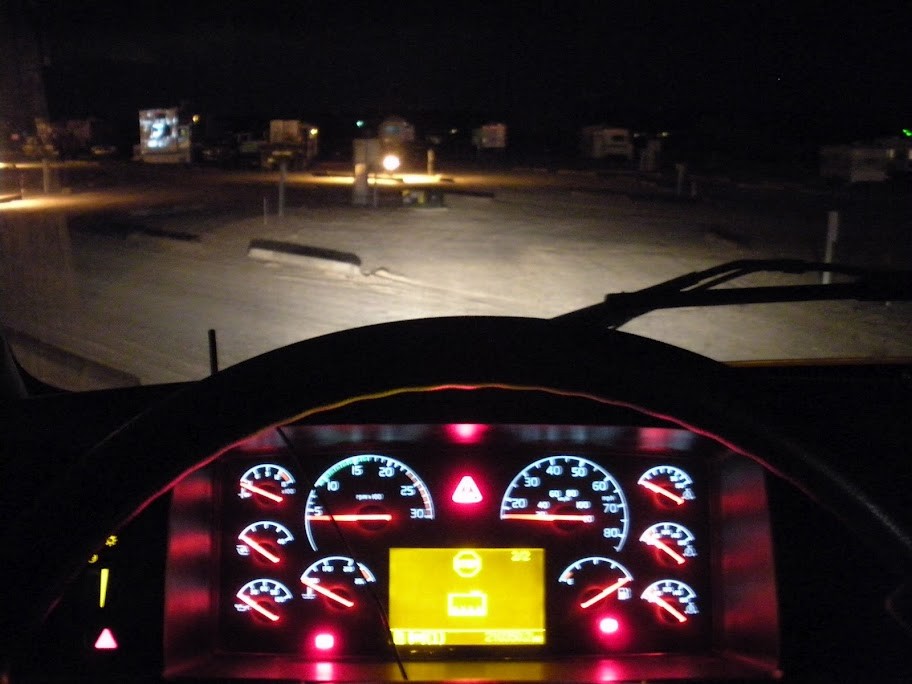 This picture shows a shot looking out with the old projectors
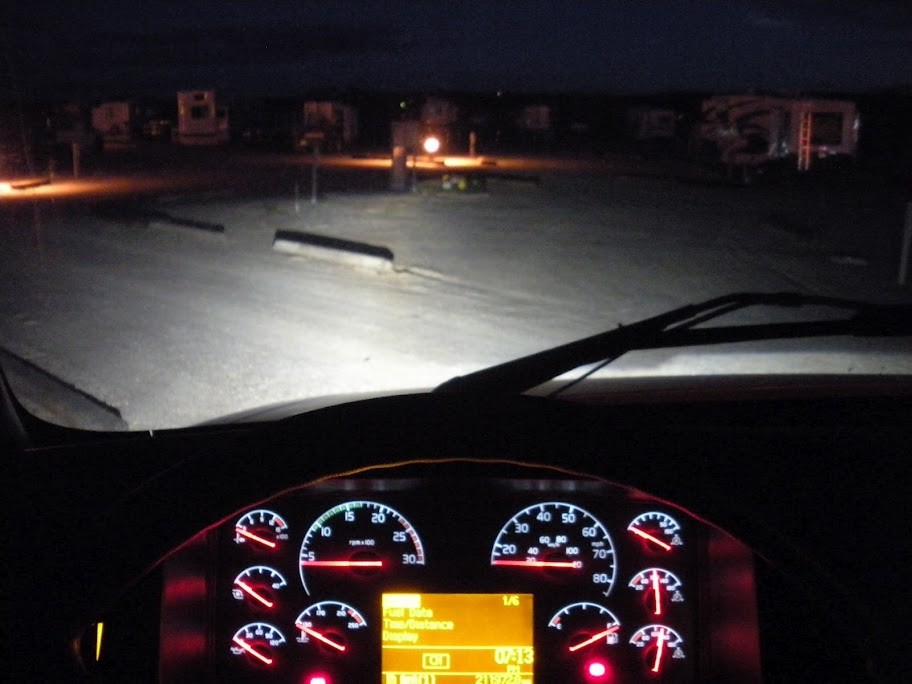 This picture shows the new projectors with the same camera.
It shows the adjuster problem: