
Fixing HVAC Controls and Dash Duct
6/21/2012
From RandyA: My dash vents would not blow air. Secondary to that, the controls were "flaky" and intermittent, if I wiggled the fan speed knob it might or might not work.
Time to take it all apart and see if I could either fix or break something.
Looked for a disassembly manual or tips - couldn't find any. Had to figure it out from scratch.
On passenger side start by removing top section. You need to take off the entry assist bar at the front of the passenger side door used to "pull up" - two 12mm bolts.
Use a T25 TORX driver to take out visible screws (2) behind pop-out covers on the top and lower left of upper plastic passenger side dash section.
Remove center wood grained plastic trim piece - it just pops off with slight prying from a screwdriver or nylon dash removal tool.
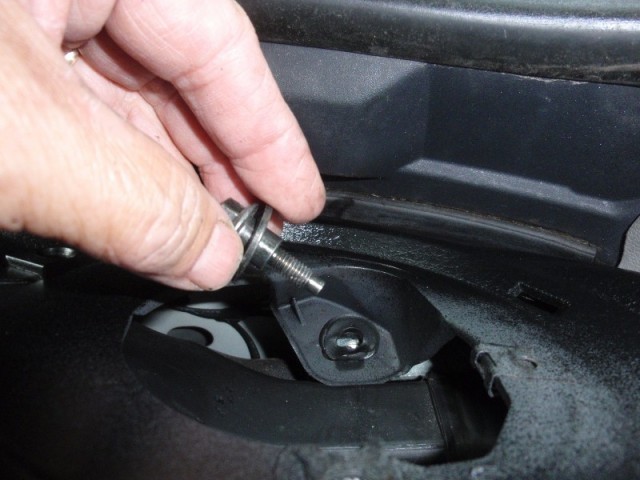 Pry off right front speaker grill with a small screwdriver or knife blade. Remove the two T25 TORX screws holding the speaker in. Lift out speaker and disconnect plugs to speaker and tweeter. Under the speaker is a 10mm bolt that holds the top of dash on that has to come out. Note this is a "special" bolt with a shoulder and rubber washer.
Finding the retaining screw behind the speaker was the hard part.
The top section of dash can now be popped (pried) lose from lower section by a narrow putty knife or screwdriver and then lifted up and off. You have clips on both the front inside lip and door side that have to be separated. You can remove the lower section if you want to, but it does not need to come out.
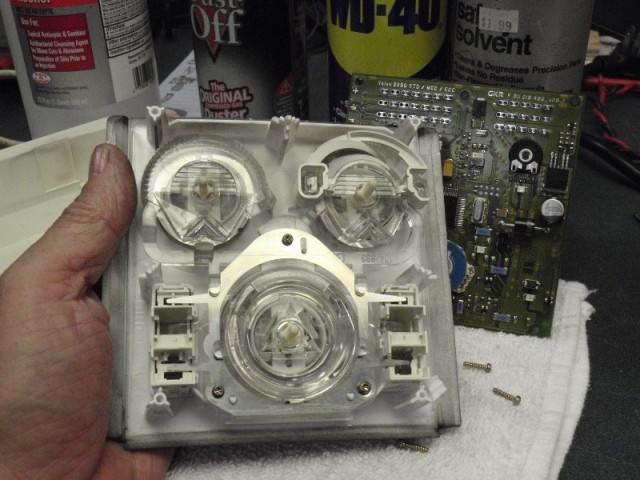
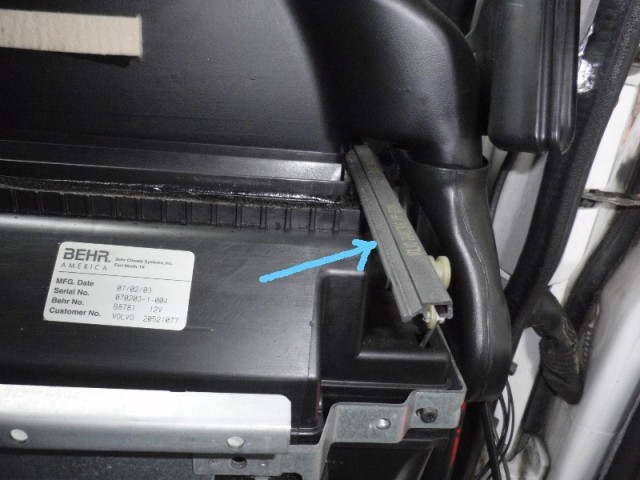 Pull out this plastic piece (blue arrow) to "unlock" dash vent air box so it can be lifted off. Once lock strip is removed pull air vent box to the right and up.
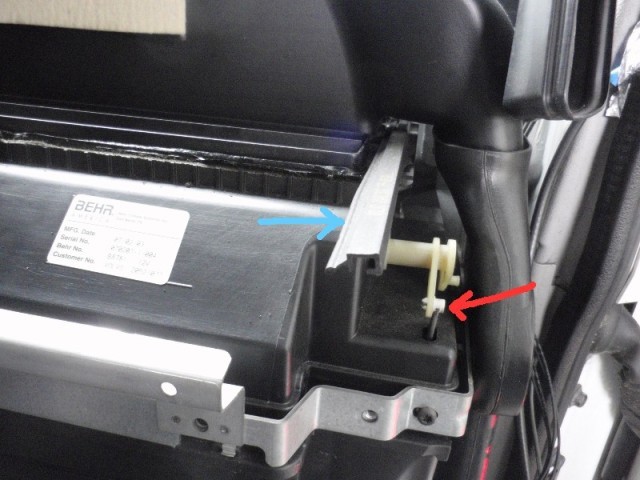 This lever (red arrow) should go up and down as temp control knob is turned. It controls air flow across heater coil and evaporator. If not, you have a problem to diagnose (ignition must be on). Mine worked OK.
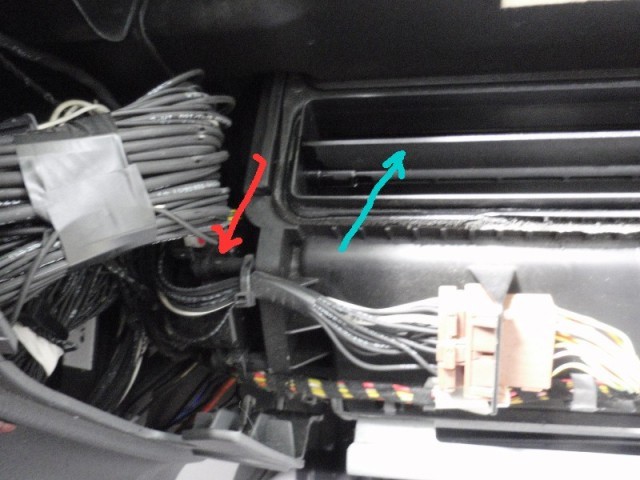 This is the baffle or shutter that controls the amount of air going to the floor, defroster and front vents (blue arrow). It should be wide open or vertical when the dash vent position is selected. Mine was not opening due to old foam gasket material and tape stopping movement. As you turn the position switch on the driver side of the dash the shutter or door should move to various positions. Control motor and gear box are on left (red arrow). Again, ignition must be on.
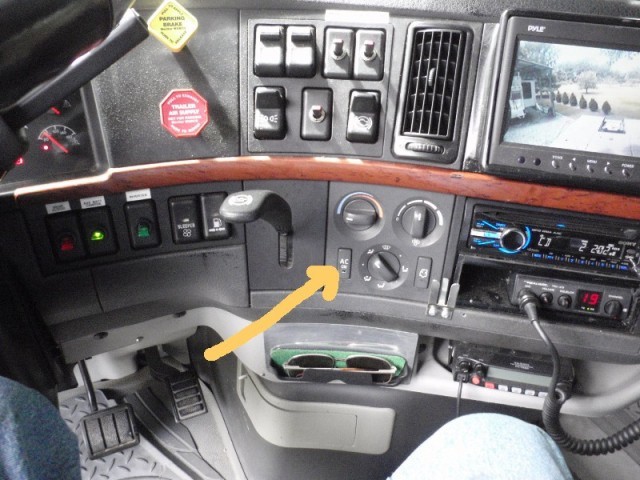 Pop off the trim at the top and bottom of the switch module (orange arrow).
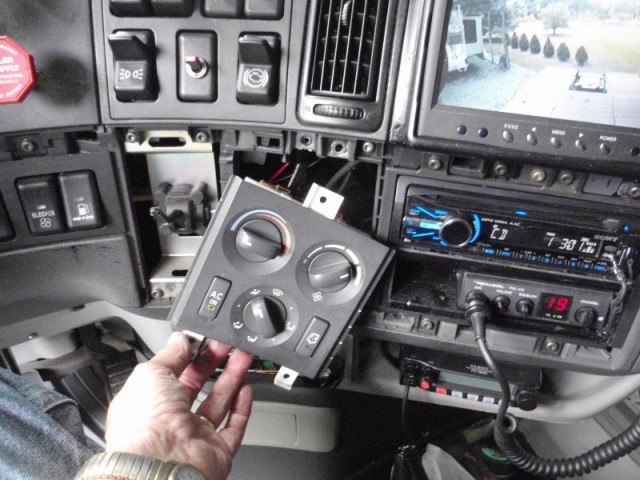 Pull off the trolley handle and pull cover around trolley handle off. Remove three TORX retaining screws and pull control panel/module forward. Disconnect two plugs and it is out.
 Module is not intended to be opened or serviced. It is an expensive part that is normally replaced as a whole module.
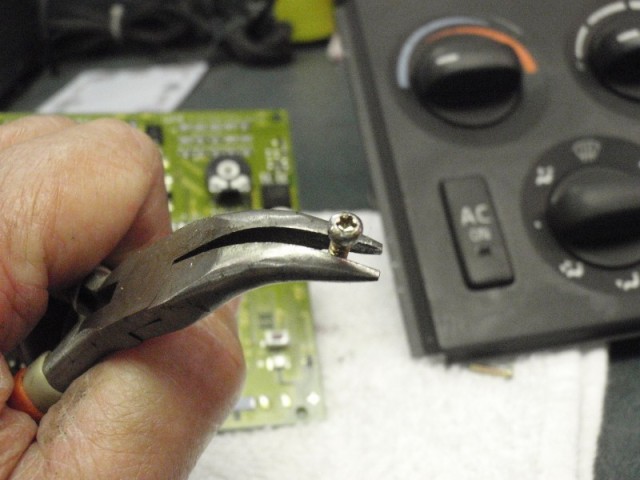 There are four screws holding on the white plastic back that have really weird safety heads pitched to only turn clockwise. I had to remove these screws with pliers placed around the outer part of the screw head. The safety screws were replaced with same size Phillips head screws in case I need to take it apart again later.
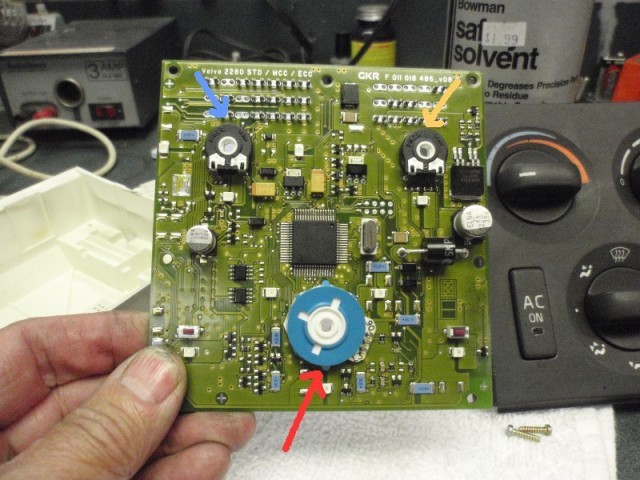 The inner circuit board contains two carbon film potentiometers - one for temp control and the other for fan speed (yellow & blue arrows) and the switch for the air flow control (red arrow).
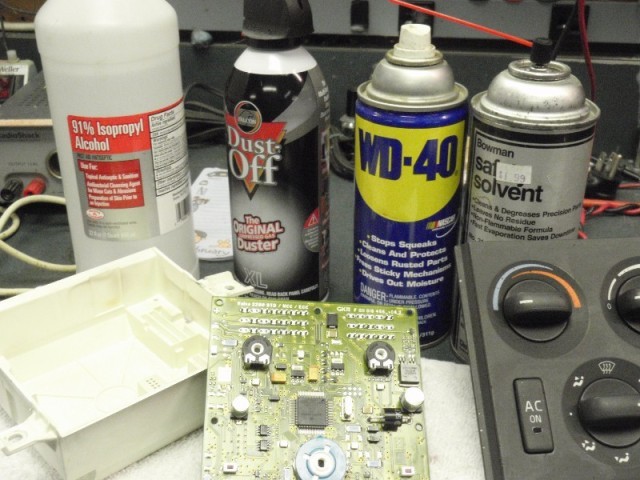 Carbon film pots notoriously get dirty and quit working. Clean the inside of the pots by spraying in a safe solvent around the shaft opening, rotate a few times, saturate with WD-40 to lube, rotate again, wash down exterior oil film with alcohol and blow off with compressed air. This will most always make the pots work like new (did on mine).
Replace everything. My vents work properly and my controls are not flaky anymore - they work very smoothly. Cold air now blows from the dash vents as it should. Again, old, rotting foam insulation had gotten into the shutter and stopped movement. Just cleaning it up solved the problem. I saved a bundle by cleaning the switch board too.
 While darker upper dash pieces are off a good cleaning is in order. I added a new coat of black vinyl color from a rattle can while they were out.
One thing I have learned about these big trucks is the ease of servicing most components. If I had done this on my Chevy PU it would have taken all day. OTR truckers and fleet operators cannot afford to be down for long periods of time - thus servicing and repair of "some" items is easier than conventional vehicles. You just need a bigger wrench and hammer.
From SEMICORRECT (Ken): Ya know, I think there's too many IC's for an HVAC board. What happened to the days of relays and switches - one good pulse and all the boards blow. Did you use ESD measures?
From RandyA: No - it most certainly is not a simple HVAC board with a few switches selecting wire wound resistors for fan speed.
All of the tactile feel of the control knobs is from a panel on the back of the switch plate made up of spring steel fingers and clear plastic for illuminating the controls from some small SMD (Surface Mount Device) LEDs.
 As noted the control board itself is akin to a small computer with a crystal (clock), small SMD switches, comparators, diodes, VR, and a PIC compatible micro controller IC. The resistance of the carbon potentiometers determines the fan speed and position of the shutter motor position. I think I remember something in one of the Volvo manuals about a periodic automatic adjustment of the door air vents after X number of key switch cycles by the module but don't remember where it was I read that.
I decided after I opened the thing up that if I was not successful in cleaning up the pots I would most likely build up something of my own - a lot simpler in design - that would give me fan speed, temperature and air flow control of the motors. As it is I did not have to dig deeper into the mode of operation to determine what type of signals are used - but I suspect PWM for the blower motor and conventional stepper logic for the shutter motors. No, no special precautions for ESD - at least this time of the year. When the air is dry and subject to static discharge I approach devices of this type differently. I do have a static mat for my bench along with the wrist strap and a good grounding buss for those times. But, with high humidity I just touch ground before touching a board.
Thanks to all for the nice comments. The only reason I take the time to photograph and write something like this up is to hopefully help someone else in a similar situation from having to spend extra time and frustration doing what I did. It is all part of the "play it forward" thing after my receiving generous help when I first got my hands on this thing (the Volvo) three years ago. Without the forum thread and many, many great articles and answers..well, let's just say being lost in a forest can be both a challenge and a frightening experience - it is best to have a path to follow. Gee - I wish I had found Mark's page pointing out the screw under the speaker first, but his title was not in my search query.